CHNJET喷气俱乐部

 找回密码
 立即注册

QQ登录

只需一步,快速开始

扫一扫,访问微社区

123
返回列表 发新帖
楼主: 超级盾

5bears制作Wren MW54涡喷发动机

[复制链接]
 楼主| 发表于 2016-5-10 20:08:04 | 显示全部楼层
欢迎大家在B站关注CHNJET
本帖最后由 超级盾 于 2016-5-10 20:39 编辑

Test run 14 Dec 2000 ConeOn/Cone Off, to 1.0 Bar

  After several attempts to properly calibrate the stand, I feel I have finally arrived at some valid numbers. Additionally, I have been putting off making the cones because basically, I was being chicken. I could see no way to accurately roll the tiny inner cone with a pretty aggressive taper. In the end, a quick call to Dennis solved the problem, and a set of ready-made cones was here in a couple of days.
  The cones Dennis supplies are devoid of tabs... these were up to me. I decided to depart from print by making the supports which connect the inner and outer cones to consist of four 0.625" SS cap screws, with a sheath of 316 SS protecting the screws in the hot exhaust stream. Once snugged tight, the inner cone was firmly fixed. This method requires a total of 8 drilled holes, and provides a neat appearance.
  Remember please that these tables are only up to 1.0 bar until I can fit a reliable rev counter! Extrapolation of the cone-on numbers to ~1.4 bar shows my engine will easily deliver in excess of 12 lb thrust. Yay!


5bears制作Wren MW54涡喷发动机

5bears制作Wren MW54涡喷发动机

Cone Off, OAT 5        C.
PSIBAREGTThrust - lb
5.00.344642.19
7.50.524523.76
10.00.694484.94
12.50.864446.19
15.01.034547.56
  The finished cone assembly. Note the round stand-offs which support the inner cone rather than tabs. Four tabs were spot-welded to the cone outer and are secured to the case rear.


5bears制作Wren MW54涡喷发动机

5bears制作Wren MW54涡喷发动机
Cone On, OAT 5        C.
PSIBAREGTThrust - lb
5.00.345372.56
7.50.525084.25
10.00.694925.56
12.50.865007.00
15.01.035068.50
  This side of the newly-run cone shows even temperatures. The other side has one spot at 10:00 (facing the turbine) which is slightly hotter, and which is where the EGT is measured.
  Interestingly, the ratio of thrust cone-on vs. cone off is a relatively constant 1.125

回复 支持 反对

使用道具 举报

 楼主| 发表于 2016-5-10 20:09:21 | 显示全部楼层
本帖最后由 超级盾 于 2016-5-10 20:40 编辑

Fitting the EGT Probe

  During the construction of the Hodgson-9 radial engine, I became acquainted with thermocouples and their use in foundry work. Measuring high temperatures nearly always employs one of three methods... a thermocouple, an RTD probe, or a non-contact IR sensor. Of the three, the thermocouple is eminently more useful for our turbojets in that it is rugged, relatively cheap, and easy to use. RTD probes, while more accurate, are expensive and less durable. IR probes are useful for measuring the temperature of solid surfaces, but gasses are another matter entirely.
  One of the best resources I have found on the web is at Omega Engineering. Not only do they sell probes and meters, they also have free literature which explains their uses.


5bears制作Wren MW54涡喷发动机

5bears制作Wren MW54涡喷发动机

  The probe ordered is stock number HKMTIN-032G-4. This is a custom built probe which shortens the normal length from 6" to 4", and sheathes the probe in inconel rather than SS. The junction is a perfect .250" stainless round which lends itself well to clamping.

5bears制作Wren MW54涡喷发动机

5bears制作Wren MW54涡喷发动机

  Two aluminum clamps were engineered. The forward clamp grips the 1/4" junction, and allows movement of the probe fore and aft. The rear probe clamps a 316 SS sheath which protects most of the .032" inconel probe along the body of the engine.
  Both clamps use the fore and aft 3-48 SHCS which secure the case outer to the case front and case rear respectively.

5bears制作Wren MW54涡喷发动机

5bears制作Wren MW54涡喷发动机

  The rear clamp is visible here, with the exposed inconel probe sheath still straight. I am going to drill a .040" hole in the outer cone, and bend the sheath into the hole, with an extension of .032" into the gas stream.
回复 支持 反对

使用道具 举报

 楼主| 发表于 2016-5-10 20:12:13 | 显示全部楼层
本帖最后由 超级盾 于 2016-5-10 20:41 编辑

A balanced compressor nutwith secure magnets

  I finished and ran my engine before I gave any thought to tachometer sensing. This was a mistake - I should have incorporated the necessary mechanical modifications before final assembly, as once the engine is running well, it is not a good idea to tear it down.
  As I progress in the ECU development, I realized that a reliable tachometer would be of huge benefit. The ECU could be programmed with just a pressure input, but self-starting would become a real challenge as there would be no way to properly verify rotation.
  So a tachometer input is needed. The PIC series of microcontrollers have a very simple set of commands which will allow one to count the number of pulses arriving at a pin, either high or low pulses, and this lends itself to just about any reasonable sensor, either IR, Hall effect (magnetic) or inductive. I chose the hall sensor (Micronas HAL506UA), as they are very reliable, deliver a square pulse due to the built-in schmidt trigger, will not be affected by sunlight, and can operate up to 10 kHz, well beyond 160,000 RPM. The bad news with the hall sensors is the requirement for a magnet to actuate the chip. The first inclination is to mill a pair of pockets on the spinner nut and glue them in... this is bound to fail with the magnets departing the spinner at freakish velocities, potentially destroying the engine or harming bystanders. In the end, I mounted the magnets as shown.


5bears制作Wren MW54涡喷发动机
5bears制作Wren MW54涡喷发动机

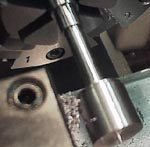
  A piece of steel was chucked and turned to the compressor boss size plus perhaps .020" for cleanup. Aluminum would do as well but not be as durable, with the aluminum threads tending to loosen a bit over time with repeated installations. The slug was drilled and tapped 1/4" x 28 left hand.
  A spare shaft was chucked and clocked to near 0 TIR, and the slug trued up a bit more, as the tapping operation will tend to cant the nut when finally in place on a shaft.

5bears制作Wren MW54涡喷发动机
5bears制作Wren MW54涡喷发动机

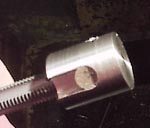
  The magnet pockets were milled out using a 5C collet fixture. Any precision method of indexing the nut by two is acceptable. Just be sure to remove identical amounts of metal from both sides. Take the time to do it right!
  The magnets are a pair of rare earth disks available at Radio Shack. They measure .197" dia by .060" thick, and are powerful little suckers. The magnets were superglued into place, with one magnet having its South pole to the outside, the other, its North pole. The South pole is the field which actuates the hall chip, so one revolution of the shaft = one pulse to the ECU. Two magnets are absolutely required for balance.

5bears制作Wren MW54涡喷发动机
5bears制作Wren MW54涡喷发动机

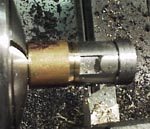
  The spare shaft was again mounted in the lathe, and this time a brass spacer is used so that when the nut is tightened, it will bottom against the spacer and not the threads, with the spacer simulating the compressor boss. Simply bottoming the nut onto the threads of the shaft alone will not work... again, it will cant out of truth rather severely and not run true. Balance, balance, balance!
  The nut is relieved left to right as shown for an aluminum sleeve to secure the magnets. I suggest a minimum wall thickness of the aluminum sleeve of .040", meaning the diameter of the nut will be reduced by .080". The magnets are also skim turned by this procedure, assuming the cylindrical shape of the rest of the nut.
  The swarf from the magnets was amazingly powerful and caused clumps of steel chips to cling to the nut. Compressed air at high velocity works well to clean out the swarf.

5bears制作Wren MW54涡喷发动机
5bears制作Wren MW54涡喷发动机

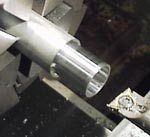
  The aluminum sleeve is turned oversized outer diameter and precision bored for an interfernece fit to the relieved aft portion of the nut from the above step. A good rule of thumb would be sleeve bore = nut diameter - .0006". If you bore oversize, either try again, or use Loctite sleeve retainer in the next step.

5bears制作Wren MW54涡喷发动机
5bears制作Wren MW54涡喷发动机

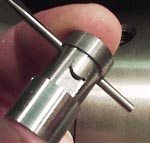
  With the sleeve bored and parted, this is what you should see... the nut is already cross-drilled for a .093" tommy bar. The nut and sleeve are moved to a press or you can use a smooth-jawed machine vise....

5bears制作Wren MW54涡喷发动机
5bears制作Wren MW54涡喷发动机

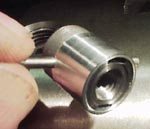
  ...and the sleeve is pressed into place. The magnets will NOT escape this assembly! Verify polarity of the magnets before you press the sleeve.

5bears制作Wren MW54涡喷发动机
5bears制作Wren MW54涡喷发动机

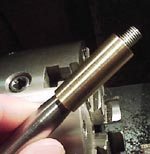
  For absolute final truing and turning of the hemispherical nose, I turned another brass spacer, this one extending all the way onto the front bearing surface of the shaft.

5bears制作Wren MW54涡喷发动机

5bears制作Wren MW54涡喷发动机

  The shaft is mounted and an indicator applied to the surface of the shaft just aft of the nut. Adjust for 0 runout, using either a 4-jaw or an "adjust-tru" style of 3-jaw. DO NOT USE AN UNADJUSTABLE 3-JAW CHUCK! This would (unless you are very lucky) produce several thou runout and render the nut useless.

5bears制作Wren MW54涡喷发动机
5bears制作Wren MW54涡喷发动机

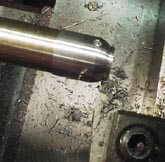
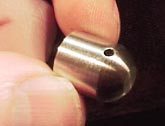
  I used a simple PC program to generate the cross-slide settings for a hemispherical nose, shown here approx. 2/3 complete. Take light cuts, as the nut is held on only by its left-hand thread, and would spin right off the shaft under the forces induced in the lathe's normal rotation.

5bears制作Wren MW54涡喷发动机
5bears制作Wren MW54涡喷发动机

  After roughing out, the nose is lightly filed with needle files and polished with wet-dry paper. The result is shown!
回复 支持 反对

使用道具 举报

 楼主| 发表于 2016-5-10 20:14:14 | 显示全部楼层
本帖最后由 超级盾 于 2016-5-10 20:42 编辑

A  Precision arbor for turning compressor nuts

  One of the real headaches with either hall IC tach sensing or the use of a magnetoresistive sensor is the requirement for a magnet to be installed somewhere on the rotor shaft. The easiest method is to create a custom compressor nut. My previous nut works fine but is very labor intensive and not suitable for any quantity of production. To correct that, I spent literally days looking for a source of rare earth (Neodymium or Samarium Cobalt) ring magnets. The ring must fit over the shaft, but also have an OD under 0.500" so that it will not extend beyond the compressor nut. The real problem was to find said ring with the poles through the diameter rather than on the faces of the ring. In the end, I found the ideal magnet. This is a class 40 Neodymium rare-earth magnet with an ID of 0.250"/6.35 mm, and an OD of 0.437"/11.1 mm. To set up my shop for repetitive machining of compressor nuts to accept these rings, I needed a rigid, dead-accurate arbor with the correct 6mm LH thread. This page details this bit of work.


5bears制作Wren MW54涡喷发动机

 5bears制作Wren MW54涡喷发动机

  A piece of 5/8" dia 12L14 steel was chucked. The shank of the arbor was then turned to exactly 0.500" for subsequent chucking via a precision collet or adjustable 3-jaw for dead-true turning. I made the shank 1.5" / 38.1mm long. The end of the shank was then turned in preparation for the threading.

5bears制作Wren MW54涡喷发动机

 5bears制作Wren MW54涡喷发动机

  Proper relief was turned with a parting tool at the base of the threaded portion. Next, the ends of the threaded shaft (both ends) were relieved at a 60 degree angle with a normal threading tool. I am using a mini-thin shank and tool tip to do this work, which is done freehand.

5bears制作Wren MW54涡喷发动机

 5bears制作Wren MW54涡喷发动机

  Thread cutting is done using normal lathe practice. Since this is a left-hand thread, the travel of the tool is from left to right. The tool tip is positioned in the relief cut next to the base of the threads, and with the lathe turned on, the leadscrew is engaged so as to force a left to right travel. Left hand threads are easier than right hand threads because when the cut is complete, the tool tip doesn't bang into any shoulders! It simply coasts to the right into the clear area of the lathe.

5bears制作Wren MW54涡喷发动机

 5bears制作Wren MW54涡喷发动机

  Getting close! As you approach the correct depth, it is important to check the fit of the nut. To do this, I was using a stock Wren compressor nut. I wanted a fairly tight fit of the nut, but more importantly, I wanted the nut to easily be able to bottom out on the precisely faced shoulder at the base of the threads. This is important... if you simply screw the nut onto a threaded shaft, but not allow it to bottom, it will be badly canted out of truth and will not be in balance when installed on a turbine.

5bears制作Wren MW54涡喷发动机

 5bears制作Wren MW54涡喷发动机

  Success! A tight, but not overly so, fit of the Wren nut. The plan for this arbor is to create nuts from round stock, embed the magnet in the base, then tap. The raw nut will then be parted off, and installed on this arbor for final turning and contouring.

5bears制作Wren MW54涡喷发动机

 5bears制作Wren MW54涡喷发动机

  After the successful threading, the arbor is parted off of the raw shaft, and the rear of the arbor faced and deburred.

5bears制作Wren MW54涡喷发动机

 5bears制作Wren MW54涡喷发动机

  The final arbor, ready to go to work for me
回复 支持 反对

使用道具 举报

您需要登录后才可以回帖 登录 | 立即注册

本版积分规则

sitemap|联系站长|版权说明|小黑屋|Archiver|手机版|CHNJET喷气俱乐部 ( 京ICP备15028347号-2 京公网安备 11011202000937号 )

GMT+8, 2024-5-2 23:01

Powered by Discuz! X3.4

© 2001-2023 Discuz! Team.

快速回复 返回顶部 返回列表